If you are looking for how to add a Custom Material Design Box to the Blogger website then this post is just for you.
I am Monish. I have been involved with coding for a long time. I will give you proper advice from long experience so let's start.
We only used then HTML and CSS. Are you upset about your website speed? do not worry it doesn't affect your website speed.
Also do not worry about it this Accordion Section also has dark mode CSS that you just want to change the dark mode class that we gave with your theme dark mode class, you can fluently change it by following this tutorial precisely.
Also do not worry about it this Accordion Section also has dark mode CSS that you just want to change the dark mode class that we gave with your theme dark mode class, you can fluently change it by following this tutorial precisely.
Features:-
- Give your blog awesome looks.
- Attract Visitors.
- Look creative.
- Easy to apply.
So without wasting important time let's check How to Add Custom Material Design Box In Your Blog
You can see the demo here:-
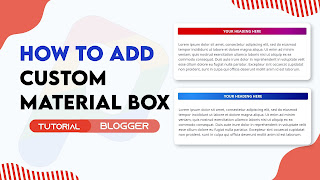
How to Add Custom Material Design Box In Your Blog
Important!Before we start adding codes in XML, I will recommend you to take a Backup of your current theme. By chance if any problem occurs, you can restore it later.
Step 1: First of all Login to your Blogger Dashboard.
Step 2: On Blogger Dashboard, click Theme.
Step 3: Click the arrow down icon next to 'customize' button.
Step 4: Click Edit HTML, you will be redirected to editing page.
Step 5: Now search the code ]]></b:skin> or /*]]>*/</style> and paste the following CSS Codes just above to it. Or you can paste it above <head/> tag by adding <style></style>
.mtbox{margin-top:17px;padding:15px;border-radius:10px;box-shadow: rgba(50, 50, 93, 0.25) 0px 2px 5px -1px, rgba(0, 0, 0, 0.3) 0px 1px 3px -1px;background-color: #ffffff; opacity: 1; background-image: radial-gradient(#e7e7e7 2px, #ffffff 2px); background-size: 40px 40px; } .box-info{padding:2px;border:1px solid #f0f0f0;margin-top:12px;border-radius:5px;background-color:#FFFFFFBF; } .mtbox h2{background:#f7176a;border-radius:5px;padding:8px 20px!important;margin:0!important;font-size:17px!important;color:#fff;top:-20px;font-weight:bold;left:30px;text-transform:uppercase;text-align: center;}
/*color by Gradient Hunt */.mtbox.yellow h2{background-image: radial-gradient( circle 957px at 8.7% 50.5%, rgba(246,191,13,1) 0%, rgba(249,47,47,1) 90% );} .mtbox.red h2{background-image: radial-gradient( circle 905.6px at 4.9% 7.9%, rgba(218,0,0,1) 14.1%, rgba(168,2,144,1) 65%, rgba(102,2,110,1) 90% );} .mtbox.blue h2{background-image: radial-gradient( circle farthest-corner at 10% 20%, rgba(37,145,251,0.98) 0.1%, rgba(0,7,128,1) 99.8% );} .mtbox.black h2{background-image: radial-gradient( circle farthest-corner at 10% 20%, rgba(90,92,106,1) 0%, rgba(32,45,58,1) 81.3% );} .mtbox.pink h2{background-image: radial-gradient( circle 602px at 2.1% 5.1%, rgba(233,0,120,1) 0%, rgba(0,0,0,1) 90.1% );}
/* darkmode color */
.drK .mtbox{box-shadow: rgba(50, 50, 93, 225.25) 0px 2px 5px -1px, rgba(225, 225, 225.3) 0px 1px 3px -1px;background-color:#292929;background-image: radial-gradient(#363434 2px, #141313 2px); background-size: 40px 40px; }.drK .box-info{background-color: #363535B5;}
Don't forget to change .drK with your website theme dark mode class, if your theme did not have a dark mode feature then keep default!
Step 6: Save the html changes by clicking on this icon
Step 7: Then go to the post/page or place which you want to add Custom Material Design Box
Step 8: Then if you are doing this in page/post then In post editor view, click icon at the bottom right of the title.Two options will appear: HTML view and Writing view, Select 'HTML View'.
Step 9: Now paste the following HTML code to that place
<!--[ change the color code as you need. red, yellow, pink, blue, black ]-->
<div class="mtbox red">
<!---[ heading h2 ]-->
<h2>Your Heading Here</h2>
<!---[ paragrap p ]-->
<div class="box-info">
<p>Lorem ipsum dolor sit amet, consectetur adipiscing elit, sed do eiusmod tempor incididunt ut labore et dolore magna aliqua. Ut enim ad minim veniam, quis nostrud exercitation ullamco laboris nisi ut aliquip ex ea commodo consequat. Duis aute irure dolor in reprehenderit in voluptate velit esse cillum dolore eu fugiat nulla pariatur. Excepteur sint occaecat cupidatat non proident, sunt in culpa qui officia deserunt mollit anim id est laborum.</p>
</div></div>
<div class="mtbox yellow"><h2>Your Heading Here</h2><div class="box-info"><p>Lorem ipsum dolor sit amet, consectetur adipiscing elit, sed do eiusmod tempor incididunt ut labore et dolore magna aliqua. Ut enim ad minim veniam, quis nostrud exercitation ullamco laboris nisi ut aliquip ex ea commodo consequat. Duis aute irure dolor in reprehenderit in voluptate velit esse cillum dolore eu fugiat nulla pariatur. Excepteur sint occaecat cupidatat non proident, sunt in culpa qui officia deserunt mollit anim id est laborum.</p></div></div><div class="mtbox blue"><h2>Your Heading Here</h2><div class="box-info"><p>Lorem ipsum dolor sit amet, consectetur adipiscing elit, sed do eiusmod tempor incididunt ut labore et dolore magna aliqua. Ut enim ad minim veniam, quis nostrud exercitation ullamco laboris nisi ut aliquip ex ea commodo consequat. Duis aute irure dolor in reprehenderit in voluptate velit esse cillum dolore eu fugiat nulla pariatur. Excepteur sint occaecat cupidatat non proident, sunt in culpa qui officia deserunt mollit anim id est laborum.</p></div></div><div class="mtbox black"><h2>Your Heading Here</h2><div class="box-info"><p>Lorem ipsum dolor sit amet, consectetur adipiscing elit, sed do eiusmod tempor incididunt ut labore et dolore magna aliqua. Ut enim ad minim veniam, quis nostrud exercitation ullamco laboris nisi ut aliquip ex ea commodo consequat. Duis aute irure dolor in reprehenderit in voluptate velit esse cillum dolore eu fugiat nulla pariatur. Excepteur sint occaecat cupidatat non proident, sunt in culpa qui officia deserunt mollit anim id est laborum.</p></div></div><div class="mtbox pink"><h2>Your Heading Here</h2><div class="box-info"><p>Lorem ipsum dolor sit amet, consectetur adipiscing elit, sed do eiusmod tempor incididunt ut labore et dolore magna aliqua. Ut enim ad minim veniam, quis nostrud exercitation ullamco laboris nisi ut aliquip ex ea commodo consequat. Duis aute irure dolor in reprehenderit in voluptate velit esse cillum dolore eu fugiat nulla pariatur. Excepteur sint occaecat cupidatat non proident, sunt in culpa qui officia deserunt mollit anim id est laborum.</p></div></div>
You can change html texts as you want in the code box!
Step 10: Then Save or Publish.
Important Information:
Here I have shared with you 5 types of heading colors.Now the question is how we will use these colors.
For this you need to change the HTML code.Take a good look at the HTML code given in Step 9.<div class="mtbox red"> You will change the names of the bookmarked colors in the text you are viewing. The color names are as follows
- red
- yellow
- blue
- black
- pink
Terms of Use
To appreciate our workshop, consider keeping the credits in canons.
We do not allow to rewrite this post in any manner. Do not copy this post, canons or any part from this composition without authorization, it's rigorously prohibited.However, Legal conduct will be taken, If you do so.
Conclusion
Hope this How to Add Custom Material Design Box In Your Blog 2022 article will be useful to you, If you have any dubieties or facing any issues while installing it also you can ask me in the comment, Do share with your musketeers, Thanks for visiting, Have a nice day!
Our All Posts Are Protected By DMCA. So Don't Try To Copy Our Posts And Reproduction In Any Way Is Strictly Prohibited! Or else Legal Actions Will Be Taken. © The Pro Project | All Rights Reserved
© Copyright:
www.the-pro-project.blogspot.com