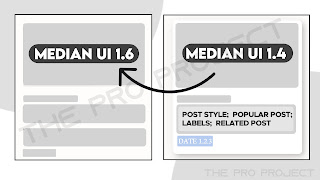
If you are looking for how to add Theme Style In Median Ui 1.6 As In Median Ui 1.4 theme On Blogger website then this post is just for you.

I am Monish. I have been involved with coding for a long time. I will give you proper advice from long experience so let's start.
We only used then HTML and CSS. Are you upset about your website speed? do not worry it doesn't affect your website speed.
Also do not worry about it this Accordion Section also has dark mode CSS that you just want to change the dark mode class that we gave with your theme dark mode class, you can fluently change it by following this tutorial precisely.
What is Median ui theme?
Median UI is designed with the dashboard UI concept, the template is recommended for use on news blogs, a simpler design but has a high level of readability is a plus point of this template.
The menu display is also made different from other templates, carrying the concept of 3 columns where the first column is devoted to the navigation menu which can minimize the navigation width.
View Demo Original Version (v1.6) View Demo Resident Version (v1.6)So without wasting important time let's check How To Add Post Style In Median Ui 1.6 As In Median Ui 1.4?
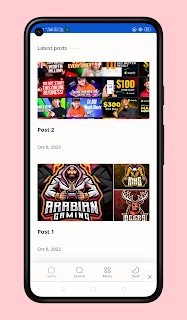
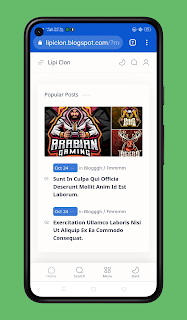
You can see the demo here:-
How To Add Theme Style In Median Ui 1.6 As In Median Ui 1.4
Important!Before we start adding codes in XML, I will recommend you to take a Backup of your current theme. By chance if any problem occurs, you can restore it later.
Step 1: First of all Login to your Blogger Dashboard.
Step 2: On Blogger Dashboard, click Theme.
Step 3: Click the arrow down icon next to 'customize' button.
Step 4: Click Edit HTML, you will be redirected to editing page.
How To Add Post Style In Median Ui 1.6 As In Median Ui 1.4

Step 5: Now type control (Ctrl) + f and search /* Article Section */ If you find it, scroll a little and you will see this article /* Sponsored */. So delete the code from /* Article Section */ to /* Sponsored */ and paste or replace the code below.
/* Article Section by The Pro Project*/ .onIndx .blogPts, .itemFt .itm{display:flex;flex-wrap:wrap;align-items:center;position:relative; width:calc(100% + 20px);left:-10px;right:-10px} .onIndx .blogPts >*, .itemFt .itm >*{flex:0 0 calc(50% - 20px);width:calc(50% - 20px); margin-bottom:0;margin-left:10px;margin-right:10px} .onIndx .blogPts >*{background:var(--contentB);box-shadow:0 5px 35px rgba(0,0,0,.07);border-radius:10px;margin-bottom:20px;padding:10px 10px 45px;position:relative} .onIndx .blogPts .pTag{padding-bottom:0} .onIndx .pTag .pInf{display:none} .onIndx .blogPts .pInf{position:absolute;bottom:15px;left:15px;right:15px} .onIndx .blogPts{align-items:stretch} .onIndx .blogPts.mty{display:block;width:100%;left:0;right:0} .onIndx .blogPts.mty .noPosts{width:100%;margin:0} .onIndx .blogPts div.ntry{padding-bottom:0;flex:0 0 calc(100% - 20px)} .blogPts .ntry.noAd .widget, .Blog ~ .HTML{display:none} /* Blog title */ .blogTtl{font-size:14px; margin:0 0 30px;width:calc(100% + 16px);display:flex;justify-content:space-between;position:relative;left:-8px;right:-8px} .blogTtl .t, .blogTtl.hm .title{margin:0 8px;flex-grow:1} .blogTtl .t span{font-weight:400;font-size:90%; opacity:.7} .blogTtl .t span::before{content:attr(data-text)} .blogTtl .t span::after{content:''; margin:0 4px} .blogTtl .t span.hm::after{content:'/'; margin:0 8px} /* Thumbnail */ .pThmb{flex:0 0 calc(50% - 12.5px);overflow:hidden;position:relative;border-radius:3px; margin-bottom:20px; background:var(--transB)} .pThmb .thmb{display:block;position:relative;padding-top:52.335%; color:inherit; transition:var(--trans-1)} .pThmb .thmb amp-img{position:absolute;top:50%;left:50%;min-width:100%;min-height:100%;max-height:108%;text-align:center;transform:translate(-50%, -50%)} .pThmb div.thmb span::before{content:attr(data-text); opacity:.7; white-space:nowrap} .pThmb:not(.nul)::before{position:absolute;top:0;right:0;bottom:0;left:0; transform:translateX(-100%); background-image:linear-gradient(90deg, rgba(255,255,255,0) 0, rgba(255,255,255,.3) 20%, rgba(255,255,255,.6) 60%, rgba(255,255,255, 0)); animation:shimmer 2s infinite;content:''} .pThmb.iyt:not(.nul) .thmb::after{content:'';position:absolute;top:0;left:0;right:0;bottom:0; background:rgba(0,0,0,.4) url("data:image/svg+xml,<svg xmlns='http://www.w3.org/2000/svg' viewBox='0 0 24 24' fill='none' stroke='%23fff' stroke-width='1.5' stroke-linecap='round' stroke-linejoin='round'><path d='M4 11.9999V8.43989C4 4.01989 7.13 2.2099 10.96 4.4199L14.05 6.1999L17.14 7.9799C20.97 10.1899 20.97 13.8099 17.14 16.0199L14.05 17.7999L10.96 19.5799C7.13 21.7899 4 19.9799 4 15.5599V11.9999Z'/></svg>") center / 35px no-repeat; opacity:0;transition:var(--trans-1)} .pThmb.iyt:not(.nul):hover .thmb::after{opacity:1}
.drK.onIndx .blogPts >*{background:var(--darkBa)}
This code can only be used by you for your personal purposes only, such as customizing your website. If you think that you will write a new article about these codes, then let us know for you, we will give 100% DMCA report on your website.
How To Add Header Style In Median Ui 1.6 As In Median Ui 1.4

Step 6: Now type control (Ctrl) + f and search /* Header Section */ If you find it, scroll a little and you will see this article /* change var(--navW) to increase header title width */. So delete the code from /* Header Section */ to /* change var(--navW) to increase header title width */ and paste or replace the code below.
/* Header Section by The Pro Project*/ header{width:100%;z-index:10; position:-webkit-sticky;position:sticky;top:0; border-bottom:var(--headerL) solid var(--contentL);box-shadow: rgba(0, 0, 0, 0.05) 0px 1px 2px 0px;} header a{display:block;color:inherit} header svg{width:20px;height:20px;fill:var(--headerI); opacity:.8} header svg.line{fill:none;stroke:var(--headerI)} .headCn{position:relative;height:var(--headerH);color:var(--headerC);background:var(--headerB); display:flex} .headL{display:flex;align-items:center;width: var(--navW) ;This code can only be used by you for your personal purposes only, such as customizing your website. If you think that you will write a new article about these codes, then let us know for you, we will give 100% DMCA report on your website.
How To Add Labels Style In Median Ui 1.6 As In Median Ui 1.4


Step 7: Now type control (Ctrl) + f and search /* Widget Label */ If you find it, scroll a little and you will see this article /* Widget ContactForm */. So delete the code from /* Widget Label */ to /* Widget ContactForm */ and paste or replace the code below.
/* Widget Label by the pro project*/ /* List Label */ .wL>*{transition: all 1s cubic-bezier(.99,.02,.03,.99)!important} .wL{box-shadow:0 0 20px 2px rgb(0 0 0 / 7%); border-radius:10px; padding:20px} .mainWrp >:not(.header) .BlogSearch + .Label .wL{background: var(--mobHv); box-shadow:0 0 20px 1.6px rgb(0 0 0 / 7%); border-radius:10px; padding:20px}.wL ul{display:flex;flex-wrap:wrap;list-style:none;margin:0;padding:0;position:relative;width:calc(100% + 30px);left:-15px;right:-15px;font-size:13px}.wL li{width:calc(50% - 10px);margin:0 5px}.wL li>*{display:flex;align-items:baseline;justify-content:space-between;color:inherit;width:100%;padding:8px 10px;border-radius:25px;line-height:20px}.wL li>* svg{width:18px;height:18px;opacity:.8}.wL li>*:hover svg,.wL li>div svg{stroke:var(--linkC)}.wL li>*:hover .lbC,.wL li>div .lbC{color:var(--linkC)}.wL .lbR{display:inline-flex;align-items:center}.wL .lbR .lbC{margin:0 5px}.wL .lbAl{max-height:0;overflow:hidden;transition:var(--trans-4)}.wL .lbM{display:inline-block;margin-top:10px;line-height:25px;color:var(--linkC)}.wL .lbM::before{content:attr(data-show)}.wL .lbM::after,.wL .lbC::after{content:attr(data-text)}.wL .lbM::after{margin:0 8px}.wL .lbT{overflow:hidden;text-overflow:ellipsis;white-space:nowrap;opacity:.7}.wL .lbC,.wL .lbM::after{flex-shrink:0;font-size:12px;opacity:.7}.lbIn:checked~.lbAl{max-height:1000vh}.lbIn:checked~.lbM::before{content:attr(data-hide)}.lbIn:checked~.lbM::after{visibility:hidden}.wL.bg ul{width:calc(100% + 10px);left:-5px;right:-5px}.wL.bg li{margin-bottom:10px}.wL.bg li>*{background:#f6f6f6}.wL.cl{display:flex;flex-wrap:wrap;box-shadow:0 0 15px rgba(0,0,0,.07); border-radius:10px; padding:20px} .drK .wL.cl{background:var(--darkBa)}.wL.cl>*,.wL.cl .lbAl>*{display:block;max-width:100%}.wL.cl .lbAl{display:flex;flex-wrap:wrap}.wL.cl .lbC::before{content:'';margin:0 4px;flex:0 0}.wL.cl .lbN{display:flex;justify-content:space-between;margin:0 0 8px;padding:9px 13px;border:1px solid var(--contentL);border-radius:3px;color:inherit;line-height:20px}.wL.cl .lbN:hover .lbC,.wL.cl div.lbN .lbC{color:var(--linkB);opacity:1}.wL.cl .lbN:not(div):hover,.wL.cl div.lbN{border-color:var(--linkB)}.wL.cl .lbSz{display:flex}.wL.cl .lbSz::after{content:'';margin:0 4px;flex:0 0}This code can only be used by you for your personal purposes only, such as customizing your website. If you think that you will write a new article about these codes, then let us know for you, we will give 100% DMCA report on your website.
How To Add Popular Post Style In Median Ui 1.6 As In Median Ui 1.4

Step 8: Now type control (Ctrl) + f and search /* Widget PopularPosts */ If you find it, scroll a little and you will see this article /* Widget Label */. So delete the code from /* Widget PopularPosts */ to /* Widget Label */ and paste or replace the code below.
/* Widget PopularPosts by The Pro Project */ .PopularPosts{padding:20px 20px 30px;background:var(--contentB);box-shadow:0 5px 35px rgba(0,0,0,.07);border-radius:10px} .itemPp{counter-reset:p-cnt} .itemPp .iCtnt{display:flex} .itemPp >*:not(:last-child){margin-bottom:25px} .itemPp .iCtnt::before{flex-shrink:0;content:'0' counter(p-cnt);counter-increment:p-cnt;width:25px;opacity:.6;font-size:85%;line-height:1.8em} .iInr{flex:1 0;width:calc(100% - 25px)} .iTtl{font-size:.95rem;font-weight:700;line-height:1.5em} .iTtmp{display:inline-flex} .iTtmp::after{content:'\2014';margin:0 5px; color:var(--widgetTac);opacity:.7} .iInf{margin:0 25px 8px; overflow:hidden;white-space:nowrap;text-overflow:ellipsis} .iInf .pLbls{display:inline;opacity:.8} .drK .PopularPosts{background:var(--darkBa)}This code can only be used by you for your personal purposes only, such as customizing your website. If you think that you will write a new article about these codes, then let us know for you, we will give 100% DMCA report on your website.
How To Add Related Post Style In Median Ui 1.6 As In Median Ui 1.4


Step 9: Now type control (Ctrl) + f and search /* Related Posts */ If you find it, scroll a little and you will see this article /*]]>*/</style>. So delete the code from /* Related Posts */ to /*]]>*/</style> and paste or replace the code below.
/* Related Posts by The Pro Project*/ .drK .rPst{background:var(--darkBa)} .rPst{margin:40px 0 0;padding: 15px;box-shadow: 0 0 25px rgb(0 0 0 / 7%);border-radius: 10px} .rPst ul{display:flex;flex-wrap:wrap; position:relative;width:100%; list-style:none;overflow-y:hidden;margin:0;padding:0; counter-reset:p-cnt} .rPst ul li{width:calc(50% - 20px);margin:0 10px 30px;position:relative} .rPst ul.s-2 li, .rPst ul.s-3 li, .rPst ul.s-4 li{width:calc(33.3% - 20px)} .rPst .iF{display:flex;flex-direction:row-reverse;align-items:flex-start;position:relative;width:calc(100% + 15px);left:-7.5px;right:-7.5px} .rPst .iF >*{margin:0 7.5px} .rPst .iF .pThmb{flex:0 0 72px} .rPst .iF .pThmb .thmb{padding-top:100%} .rPst .iF .pCtnt{display:flex;flex-grow:1;width:calc(100% - 102px)} .rPst .iF .pCtnt::before{flex-shrink:0;content:'0' counter(p-cnt);counter-increment:p-cnt;width:25px;opacity:.6;font-size:85%;line-height:1.8em} .rPst .iF .pInf{position:relative;margin-top:8px} .rPst .iF .pInr{flex:1 0;width:calc(100% - 25px)} .rPst .iF .pSnpt{font-size:93%;margin-top:8px} .pTag + .pFoot .rPst .pSnpt{display:none} .rPst .thmb::before{content:'No image';display:block;position:absolute;top:50%;left:50%;max-width:none;max-height:100%;-webkit-transform:translate(-50%, -50%);transform:translate(-50%, -50%); font-size:12px; opacity:.7;white-space:nowrap} .rPst .thmb div{background-position:center;background-size:cover;background-repeat:no-repeat; position:absolute;top:0;left:0;bottom:0;right:0} .rPst .pSnpt{} .rPst .pInf{position:absolute;bottom:0;left:0;right:0} .rPst .pInf::before{content:attr(data-date);opacity:.8} .rPst .s-4 li{padding-bottom:30px} @media screen and (max-width:640px){.rPst ul:not(.s-2) li, .rPst ul:not(.s-3) li, .rPst ul:not(.s-4) li{width:calc(100% - 20px)} .rPst .iF{max-width:500px;margin-left:auto;margin-right:auto} .rPst ul.s-2 li, .rPst ul.s-3 li, .rPst ul.s-4 li{width:calc(50% - 20px)}} @media screen and (max-width:500px){.rPst ul{100%} .rPst ul li{width:calc(50% - 15px);margin:0 7.5px 30px} .rPst ul:not(.s-2) li, .rPst ul:not(.s-3) li, .rPst ul:not(.s-4) li{width:calc(100% - 15px)} .rPst ul.s-2 li{width:calc(50% - 15px)} .rPst ul.s-2 .iTtl, .rPst ul.s-3 .iTtl{flex-grow:1;font-size:14px} .rPst ul.s-3 li{width:100%;margin:0 0 20px} .rPst ul.s-3 .i{display:flex;align-items:center} .rPst ul.s-3 .i >*{flex:0 0 calc(40% + 15px);margin:0 7.5px} .rPst ul.s-3 .iTtl a::after{content:attr(data-text);display:block;margin-top:8px;font-weight:400;font-size:12px;opacity:.7} .rPst ul.s-4{flex-wrap:nowrap;width:100%;right:-20px;left:-6.5px; overflow-y:hidden;overflow-x:scroll;scroll-behavior:smooth;scroll-snap-type:x mandatory; -ms-overflow-style:none;-webkit-overflow-scrolling:touch} .rPst ul.s-4 li{flex-shrink:0;width:80%;margin-bottom:0;scroll-snap-align:center}} This code can only be used by you for your personal purposes only, such as customizing your website. If you think that you will write a new article about these codes, then let us know for you, we will give 100% DMCA report on your website.
Step 10: Save or Publish the html changes by clicking on this icon
Terms of Use
To appreciate our workshop, consider keeping the credits in canons.
We do not allow to rewrite this post in any manner. Do not copy this post, canons or any part from this composition without authorization, it's rigorously prohibited.However, Legal conduct will be taken, If you do so.
Conclusion
In this article I have made a tutorial on How To Add Theme Style In Median Ui 1.6 As In Median Ui 1.4. I Hope you have liked this article and please do share with your friends and follow up blog for more.
Our All Posts Are Protected By DMCA. So Don't Try To Copy Our Posts And Reproduction In Any Way Is Strictly Prohibited! Or else Legal Actions Will Be Taken. © The Pro Project | All Rights Reserved
© Copyright:
www.the-pro-project.blogspot.com