If you are looking for how to add a nice Code Box With A Beautiful Copy,Preview And Download Code Button feature to blogger website then this post is just for you.
You may know that adding Code Box feature requires the use of various third-party plugins or code libraries, which slow down the loading speed of the website. So no problem read this post today, even if you don't know coding you can add awesome Code Box feature to your website. You will work the way I tell you and the result will be beautiful when the work is done.
I am Monish. I have been involved with coding for a long time. I will give you proper advice from long experience so let's start.
We only used then HTML, CSS and JS , Are you upset about your website speed? do not worry it doesn't affect your website speed.
Your website has a dark mode function and you fussing about it works impeccably in dark mode?
Also do not worry about it this Code Box also has dark mode CSS that you just want to change the dark mode class that we gave with your theme dark mode class, you can fluently change it by following this tutorial precisely.
So without wasting important time let's check how to add a code box in Blogger.
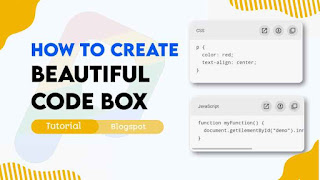
You can see the demo here:-
How To Create A Code Box With A Beautiful Copy And Download Code Button For Blogger?
Important!Before we start adding codes in XML, I will recommend you to take a Backup of your current theme. By chance if any problem occurs, you can restore it later.
Step 1: First of all Login to your Blogger Dashboard.
Step 2: On Blogger Dashboard, click Theme.
Step 3: Click the arrow down icon next to 'customize' button.
Step 4: Click Edit HTML, you will be redirected to editing page.
Step 5: Now search the code ]]></b:skin> or /*]]>*/</style> and paste the following CSS Codes just above to it.
/* Code Box by The Pro Project*/ .pre{background:#f6f6f6;color:#2f3337;direction: ltr;position:relative;border-radius:3px;overflow:hidden;margin:1.7em auto}
.pre pre{margin:0;color:inherit;background:inherit;display:block;position:relative;font-size:13px;line-height:1.6em;border-radius:3px;padding:30px 20px 20px;-moz-tab-size:2;tab-size:2;-webkit-hyphens:none;-moz-hyphens:none;-ms-hyphens:none;hyphens:none; overflow:auto;direction:ltr;white-space:pre}
.pre.adv{border-radius:10px}
.pre.adv::before{display:none}
.pre:not(.str) .prCd{display:none}
.pre.str .prTl{display:none;}
.pre.adv pre{padding-top:60px}
.preM{position:absolute;top:0;right:0;left:0;width:100%;background: rgba(0,0,0,.04);padding:10px 10px 10px 20px;display:flex;justify-content:space-between;align-items:center;flex-wrap:nowrap;z-index:2}
.preT{font-size:12px;font-family: var(--fontC);line-height:1rem;position:relative;overflow:hidden;white-space:nowrap;text-overflow:ellipsis;padding-right:10px;}
.preA{display:flex;gap:8px;white-space:nowrap;}
.preA button{outline:none;border:none;width:30px;height:30px;background:#d9d9d9;padding:0;margin:0;border-radius:50%;transition:border-radius .2s ease;display:inline-flex;align-items:center;justify-content:center;cursor:pointer;}
.preA button:hover{border-radius:40%;}
.preA button >svg{width:18px;height:18px;stroke:none;fill:#2e2e2e;transition: all .5s ease;}
.pre.cpd .prCp svg, .pre.pnd .prDl svg, .pre.dwn .prDl svg{animation: jiggle 1s}
.pre.cpd .prCp svg .a,.pre:not(.cpd) .prCp svg .b{opacity:0}
.pre.dwn .prDl svg .a, .pre.pnd .prDl svg .a,.pre:not(.pnd) .prDl svg .b,.pre:not(.dwn) .prDl svg .c{opacity:0}
@keyframes jiggle{0%{transform:rotate(0)}20%{transform:rotate(26deg)}40%{transform:rotate(-26deg)}60%{transform:rotate(26deg)}80%{transform:rotate(-26deg)}100%{transform:rotate(0)}}
@-webkit-keyframes jiggle{0%{transform:rotate(0)}20%{transform:rotate(26deg)}40%{transform:rotate(-26deg)}60%{transform:rotate(26deg)}80%{transform:rotate(-26deg)}100%{transform:rotate(0)}}
Don't forget to change highlighted .drK with your website theme dark mode class, if your theme did not have a dark mode feature then keep default!
Step 6: Find the tag </body> or some template will be </body> and add the JavaScript below and above it:
<script>/*<![CDATA[*/
0<document.querySelectorAll('div.pre.nb').length&&(() => {
let preD = document.querySelectorAll('div.pre.nb');
function saveDoc(x, d, n) {
if (n = typeof n == 'string' ? n : 'text/plain', d = typeof d == 'string' ? d : 'File_' + (new Date).getTime() + '.txt', x) {
n = new Blob([x], {
type: n
});
if (navigator.msSaveBlob) return navigator.msSaveBlob(n, d); {
let x = window.URL.createObjectURL(n),
c = document.createElement("a");
c.classList.add('hidden'), c.href = x, c.download = d, document.body.appendChild(c), c.click(), c.remove(), window.URL.revokeObjectURL(x)
}
}
}
for (let r = 0; r < preD.length; r++) {
let b = preD[r];
b.classList.add('adv');
let x = b.dataset.text || 'File_' + (new Date).getTime(),
e = b.dataset.file || x,
_ = b.dataset.lang || '.txt',
m = 'undefined' !== typeof b.dataset.time ? isNaN(Number(b.dataset.time)) ? 'false' === b.dataset.time ? 0 : 10 : Number(b.dataset.time) : 10,
c = 'undefined' === typeof b.dataset.download || b.dataset.download == 'true',
d = 'undefined' === typeof b.dataset.copy || b.dataset.copy == 'true',
n = 'undefined' === typeof b.dataset.view || b.dataset.view == 'true',
a = b.querySelector('pre'),
t = a.innerText;
b.insertAdjacentHTML('afterbegin', "<div class='preM'><div class='preT'><span class='prTl'>" + (null == x ? '</>' : x) + "</span><span class='prCd'></span></div><div class='preA'>" + (n ? '\x3C!--[ Prev' + "iew ]--><button class='prVw'><svg viewBox='0 0 24 24'><path d='M14,3V5H17.59L7.76,14.83L9.17,16.24L19,6.41V10H21V3M19,19H5V5H12V3H5C3.89,3 3,3.9 3,5V19A2,2 0 0,0 5,21H19A2,2 0 0,0 21,19V12H19V19Z'/></svg></button>" : "") + (c ? "\x3C!--[ Download ]--><button class='prDl'><svg viewBox='0 0 24 24'><path class='a' d='M8 17V15H16V17H8M16 10L12 14L8 10H10.5V6H13.5V10H16M12 2C17.5 2 22 6.5 22 12C22 17.5 17.5 22 12 22C6.5 22 2 17.5 2 12C2 6.5 6.5 2 12 2M12 4C7.58 4 4 7.58 4 12C4 16.42 7.58 20 12 20C16.42 20 20 16.42 20 12C20 7.58 16.42 4 12 4Z'/><path class='b' d='M13,2.03C17.73,2.5 21.5,6.25 21.95,11C22.5,16.5 18.5,21.38 13,21.93V19.93C16.64,19.5 19.5,16.61 19.96,12.97C20.5,8.58 17.39,4.59 13,4.05V2.05L13,2.03M11,2.06V4.06C9.57,4.26 8.22,4.84 7.1,5.74L5.67,4.26C7.19,3 9.05,2.25 11,2.06M4.26,5.67L5.69,7.1C4.8,8.23 4.24,9.58 4.05,11H2.05C2.25,9.04 3,7.19 4.26,5.67M2.06,13H4.06C4.24,14.42 4.81,15.77 5.69,16.9L4.27,18.33C3.03,16.81 2.26,14.96 2.06,13M7.1,18.37C8.23,19.25 9.58,19.82 11,20V22C9.04,21.79 7.18,21 5.67,19.74L7.1,18.37M12,16.5L7.5,12H11V8H13V12H16.5L12,16.5Z'/><path class='c' d='M12,2A10,10 0 0,0 2,12A10,10 0 0,0 12,22A10,10 0 0,0 22,12A10,10 0 0,0 12,2M12,20C7.59,20 4,16.41 4,12C4,7.59 7.59,4 12,4C16.41,4 20,7.59 20,12C20,16.41 16.41,20 12,20M7,15H17V17H7V15M10.3,11.2L8.4,9.3L7,10.7L10.3,14L17,7.3L15.6,5.9L10.3,11.2Z'/></svg></button>" : "") + (d ? "\x3C!--[ Copy ]--><button class='prCp'><svg viewBox='0 0 24 24'><path class='a' d='M20,16V4H8V16H20M22,16A2,2 0 0,1 20,18H8C6.89,18 6,17.1 6,16V4C6,2.89 6.89,2 8,2H20A2,2 0 0,1 22,4V16M16,20V22H4A2,2 0 0,1 2,20V7H4V20H16Z'/><path class='b' d='M20,16V10H22V16A2,2 0 0,1 20,18H8C6.89,18 6,17.1 6,16V4C6,2.89 6.89,2 8,2H16V4H8V16H20M10.91,7.08L14,10.17L20.59,3.58L22,5L14,13L9.5,8.5L10.91,7.08M16,20V22H4A2,2 0 0,1 2,20V7H4V20H16Z'/></svg></button>" : "") + '</div></di' + "v>");
let i = b.querySelector('.prVw'),
l = b.querySelector('.prDl'),
f = b.querySelector('.prCp'),
W = b.querySelector('.prCd');
null !== i && i.addEventListener('click', () => {
var x = '#252526';
x = '<!DOCTYPE html><html><head><title>' + e.replace(/\./g, "").replace(/ /g, "_") + _ + "</title><meta content='width=device-width,initial-scale=1,user-scalable=1,minimum-scale=1,maximum-scale=5' name='viewport'/><meta content='" + x + "' name='theme-color'/><meta content='" + x + "' name='msapplication-navbutton-color'/><meta content='" + x + "' name='apple-mobile-web-app-status-bar-style'/><link rel='shortcut icon' type='image/png' href='https://blogger.googleusercontent.com/img/b/R29vZ2xl/AVvXsEhn2ytKJJvyxZVhBy0MeWiFJKojSTigR33J6ZxcroTM8aNg1bv-G7Zg0Czpu1t6cq7Q56PuCsmK1Q5IntwA0qdrdI9Fvnw5Otjt75r-hfVYP8ncPBdxXHHu5p8RAf67SCoSd9SqfcbTt9WPfn-OiOCU_7fucSq61kZqXRrZ0aqW7AMuvFWDPKwzUHT8nw/s320/20221002_004326.png'><style>body{min-height:100vh;background:#252526;color:#fff}*{margin:0;padding:0}html{line-height:1em;background:#1d1f21;color:#c5c8c6}pre{white-space:pre-wrap;word-wrap:break-word;word-break:break-all;padding:20px}pre i{font-style:normal}</style></head><body><div class='pre'>" + a.outerHTML + '</div></body></html>';
x = new Blob([x], {
type: 'text/html'
});
window.navigator.msSaveOrOpenBlob ? window.navigator.msSaveOrOpenBlob(blobObject, fileName) : (x = window.URL.createObjectURL(x), window.open(x, '_blank'), window.URL.revokeObjectURL(x))
}),
null !== l && l.addEventListener('click', () => {
l.disabled = !0;
let c = m;
b.classList.add('pnd', 'str'), W.innerHTML = 0 !== m ? 'Please wai' + "t " + c + 's...' : 'Please wai' + 't...';
let a = setInterval(() => {
0 !== m && --c, 0 !== m && (W.innerHTML = 'Please wait ' + c + 's...'), c <= 0 && (clearInterval(a), setTimeout(() => {
W.innerHTML = 'Downloading...', setTimeout(() => {
b.classList.remove('pnd'), b.classList.add('dwn'), saveDoc(t, e.replace(/\./g, "").replace(/ /g, "_") + '_by_The_Pro_Project' + _, 'text/plain'), W.innerHTML = 'Download started...', setTimeout(() => {
b.classList.remove('dwn', 'str'), l.disabled = !1
}, 3e3)
}, 2e3)
}, 1e3))
}, 1e3)
}),
null !== f && f.addEventListener('click', () => {
var x = getSelection(),
c = document.createRange();
c.selectNodeContents(a), x.removeAllRanges(), x.addRange(c), document.execCommand('copy'), x.removeAllRanges(), f.disabled = !0, b.classList.add('cpd'), setTimeout(function() {
b.classList.remove('cpd'), f.disabled = !1
}, 3e3)
})
}})();
/*]]>*/</script>
You can change highlighted texts as you want in the code box!
Step 7: Save the html changes by clicking on this icon
Step 8: Then go to the page/post or place which you want to add code box
Step 9: Then if you are doing this in page/post then don't forget to change Compose view to the HTML view
Step 10: Now paste the following HTML code to that place
<div class='pre nb' data-text='typecode' data-file='filename' data-lang='fileformat' data-time='true' data-download='true' data-copy='true' data-view='true'>
  <pre>
      <!-- Code -->
  </pre>
</div>
You can change highlighted texts as you want in the code box!
Step 11: Then Save or Publish.
Important Information:
data-textis the type of code, e.g. CSS, HTML or JavaScriptdata-fileis the download name of Filedata-langis the format of the file, for example: .css, .js, .html, .txt .
If it is not changed it will remember the default which is.txtdata-downloadis to show download button true or falsedata-copyis to show copy button true or falsedata-viewis to show preview button true or falsedata-download,data-copy,data-viewthese three changes are not necessary.<!-- Code -->Enter your code here- If you write direct html code here it won't do a work. You need to use HTML PARSER to change the html code
Terms of Use
To appreciate our workshop, consider keeping the credits in canons.
We do not allow to rewrite this post in any manner. Do not copy this post, canons or any part from this composition without authorization, it's rigorously prohibited.However, Legal conduct will be taken, If you do so.
Conclusion
Hope this How to Create A Code Box With A Beautiful Copy And Download Code Button For Blogger article will be useful to you, If you have any dubieties or facing any issues while installing it also you can ask me in the comment, Do share with your musketeers, Thanks for visiting, Have a nice day!
Source:
www.plus-ui.fineshopdesign.com